FREE SHIPPING ORDERS OVER $50

Frequently Asked Questions
Grip Kits
1” Wide at the widest point
Tape will dry enough to swing in 2 hrs after gripping the club
Yes, you can use a paint tray or something similar to catch excess solvent to use for future projects
We recommended every 50 rounds or every 12 months whichever comes first
The grip is one of the most important components in golf and the only part of the club that you actually touch. Grips are made of materials that age and wear as a function of time and use. Ozone, heat, dirt and oils from your hands all age your grips and cause the natural degradation of the grip. The traction that a fresh grip provides lets you hold the club lightly without the subconscious fear of losing the club during your swing. This relaxed state promotes proper swing mechanics and wrist action. While a worn grip causes you to grasp the club tighter, causing arm and wrist tension that inhibits proper swing mechanics and leads to loss of power and control. A fresh set of grips is an inexpensive and fast way to bring a noticeable change to your game.
Tutorials
Step 1: Secure the shaft in a vise near the tip of the grip using the protective Rubber Vise Clamp. Position the club face perpendicular to the floor in the playing position.
Step 2: Remove the old grip with a straight blade or stripper. (Use a utility knife with a hook blade on graphite shafts to avoid damage to the shaft.) Be sure to cut away from yourself at all times. Peel or scrape off the old grip and grip tape.
Step 3: Apply the grip tape with 1/4″ over the edge and smooth over the shaft of the club. (Note that the grip tape will not be as long as the grip itself, that is OK)
Step 4:Remove the tape backing and cover the end of the shaft with extra tape pushing it into the end of the shaft.
Step 5: Cover the vent hole in the butt end with your finer or golf tee, spray/pour a generous portion of Grip Solvent inside the new grip. Close the open end of the grip with your hand and shake to cover the entire inside of the grip.
Step 6: Pour the excess Grip Solvent (through the vent hole) over the entire length of the two sided tape. Apply generously.
Step 7: Place the grip over the shaft butt (with alignment pattern up) onto the club by squeezing the open end of the grip. This must be done while the grip is still wet with Grip Solvent. Push the grip entirely onto the club. Be sure the grip butt is against the shaft butt.
Step 8: The grip can now be properly aligned with the pattern square to the club face. (This must happen within a minute or so after applying the grip.)
Step 9: Allow grips to dry a few hours before playing.
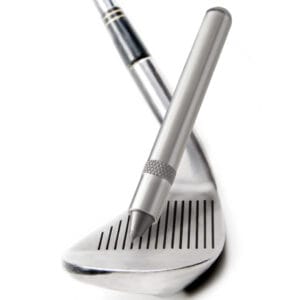
The nU Groove Sharpener is very simple to use. Whether you would just like to clean the debris out of your grooves or sharpen them back to “Like New”, our step by step instructions will provide the steps to take to get maximum spin immediately!
Step 1: Thoroughly clean the club face with soapy water, get rid of all the soft dirt, grit and remove any stones.
Step 2: The easiest way to use the tool is to prop the club up against a wall whilst holding the head onto a workbench or table top, then with a drawing stroke drag the blade across the grooves with the blades edge at a 45 degree angle for V and U grooves, almost vertical for square grooves.
Step 3: Make the first 3-4 passes slowly and without much force, then you can put more pressure into the stroke.
Use WD40 or lubricant to assist the tool
10 minutes per head should be plenty to get the edges back into good condition.
Repeat every 10 – 15 rounds.